8 Tips for Installing a Drive Unit
Chris Heeg 04.10.2019

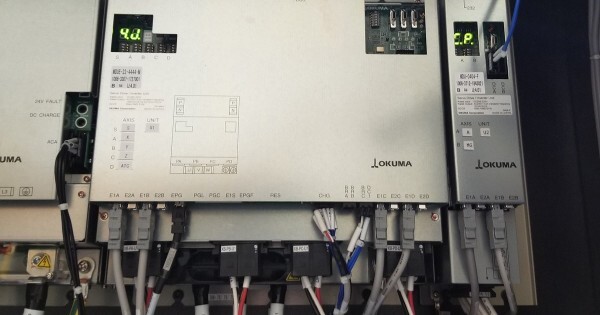
Okuma designs and builds our machine tools to be strong enough to provide many years of use before needing a drive unit replacement (depending on run time, etc.). But as your machine gets older, the day will eventually come when you’ll need to perform this service. There’s no preventive maintenance required for drive units, so the way you can tell you need to replace it is when an alarm pops up. When replacing your drive unit, here are a few tips for things you can do that will save time and money in the long run.
- Check the switch settings. Depending on the generation of your drive, the settings on the switches could be setting the current limits or just addressing the drive unit. Either way, making sure these are correct will save troubleshooting time if the drive doesn’t power up and run.
- Replace the filter for the back side of the cabinet. This filter keeps the fans and heat sink for the drive clean and running efficiently. If you pull the drive out and it’s dirty, then the filter needs to be replaced and checked more often.
- Replace the gasket to seal the electrical cabinet. The electrical cabinet needs to be kept clean, and the one of the biggest reasons the cabinet doesn’t stay clean is that, when drives are replaced, the gasket to the cabinet isn’t also replaced.
- Inspect the motor cables. When you replace the drive unit, take the time to check on the condition of the cables. If the insulation is loose, cracked, or discolored, they may have gotten hot, which could be a sign of problems that need to be addressed.
- Check the motor fan. If the drive unit is running a spindle, check to see if the motor is a freestanding version (not built into the spindle shaft). These fans keep the motor cool and running efficiently. If they’re dirty, the motor runs hotter, causing the motor to overheat, which could lead to a short that damages your drive unit.
- Investigate the DC BusBars screws. When you put the new drive in, make sure that the screws on the DC BusBars or cables are tight. If the screw is too long and bottoms out before getting tight, you will not be getting all the current to run the drive. This will lead to performance issues and possibly difficult alarms.
- Re-label the drive. The replacement drive isn’t going to be labeled for your machine. Take a few minutes to mark the drive with the axis names and unit number from the original. This will help anyone who has to work on the machine in the future know what the drive unit is and does.
- Check the axis and spindle loads. Later you’ll be glad you did this! When working on a machine it’s easy to wonder what is normal. So taking a few moments to get these baseline numbers could make answering this question easy the next time you have to check on a problem.
Chris Heeg is Board Repair Supervisor, Okuma America Corporation.
We offer a variety of ways for you to stay informed about our events, and to receive general Okuma updates. Fill out the form below to let us know the type of information you'd like to receive.

